 Image 1 of 1
Foundation Certificate - Silvers, Base Metals or both!
After paying, you will need to send your YouTube email address to Ros Bailey either through FB messenger or email - info@aussiemetalclay.com (Messenger preferred). If you need any assistance, please contact Ros Bailey for assistance.
To find your YouTube email address please go into YouTube, in the upper right-hand corner you will see either your initial or your icon, would you please click on that and send me what the email address is that is attached to it.
You may NOT resell, modify, share or claim any part of this video or this digital download file as your own work.
Please give credit to the author of this, or any, tutorial when using these techniques.
Embark on a transformative journey in your artistic endeavours by prioritizing self-investment. Elevate your craft, not just through passion, but through deliberate efforts to enhance your skills and techniques. Dedicate time to hone your abilities, explore new methods, and unlock your full potential as an artist.
Challenge yourself to step out of your comfort zone and embrace growth. By investing in yourself, you lay the foundation for a brighter artistic future. Gain confidence in your abilities as you master new techniques and refine existing ones. Let your dedication shine through as you commit to continuous improvement.
As you progress, consider pursuing certification to validate your newfound expertise. Let your certification serve as a testament to your commitment to excellence and your readiness to take on new opportunities. Whether it's through formal accreditation or specialized training, seek recognition for your skills and knowledge.
Dream big and set your sights on new horizons. Take the skills you've acquired and explore teaching opportunities as an AMC (Aussie Metal Clay) instructor. Share your expertise with others and inspire them to embark on their own artistic journeys. As you guide others, you further solidify your mastery and leave a lasting impact on the creative community.
Remember, your potential as an artist knows no bounds. The greatness you achieve is directly proportional to the investments you make in yourself. Join our certification program designed specifically for aspiring metal clay artists and educators eager to elevate their craft. Together, let's sculpt a future where creativity knows no limits.
Foundation Technique Certification Course
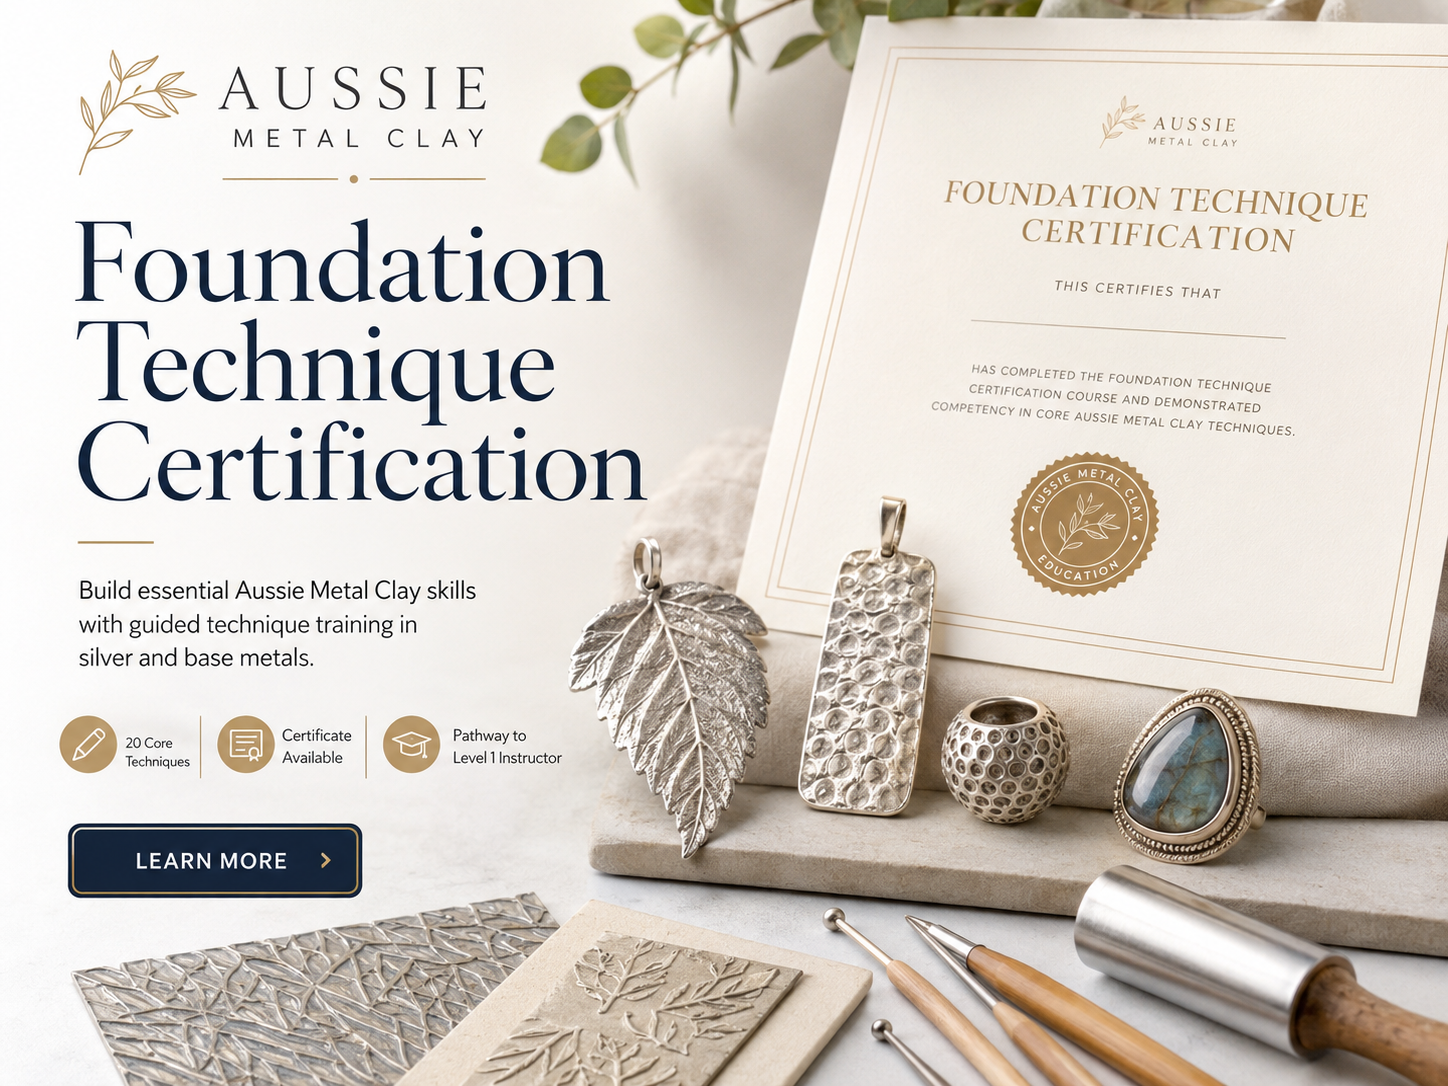
Build confidence in the essential Aussie Metal Clay techniques with this comprehensive Foundation Technique Certification course.
This course is designed to help you develop, practise, and submit a range of foundational metal clay techniques for assessment. Upon successful completion, you will receive a Foundation Technique Certificate.
Please note: this course does not certify you as an Aussie Metal Clay Certified Instructor. Once you complete your Foundation Technique Certification, you will receive guidance on the next steps to progress toward becoming a Level One Aussie Metal Clay Certified Instructor.
Once you have completed the Aussie Metal Clay Foundation Course you can apply to complete your Level one Teachers Certification
Certification Options
The Foundation Technique Certification offers flexible certificate options. You may choose to complete your certification in:
Base Metal
Silver
Both Base Metal and Silver
Duplicate certificates are available if you complete more than one category.
What You Will Learn
This course covers a wide range of core metal clay skills, including:
Working with textures, templates, and moulds
Doming and draping techniques
Creating and attaching bails
Weaving and syringe weaving
Using embeddables and findings
Creating leaf-textured pendants
Making hollow lentil beads
Setting CZ stones
Creating matching embellishments
Sanding and refining greenware
Torch firing .999 silver
Kiln firing silver, .960 silver, Argentium silver, and base metals
Finishing and polishing fired pieces
Course Outline
Video 1: Introduction, Products, Tools and Safety
In this section, Ros Bailey and Kim Booklass introduce the Technique Certification course and the Aussie Metal Clay product range.
Topics include:
Aussie Metal Clay base metals
.999 and .960 silver clays
ClayStay Syringe
ClayStay Pen
ClaySpray
Aussie Lube and essential oil release agents
Suggested tools
Drying equipment
Drying tests
Tumblers
Kiln containers
Safety essentials
Video 2: Core Techniques in Silver and Base Metal
This video introduces key forming, firing, and construction techniques.
Topics include:
Templates, textures, and moulds
Doming in silver
Draping and embeddables in silver
Weaving in silver
Kiln firing .999 silver
Syringe weaving and bails in base metal
Draping and embeddables in base metal
Stage 1 burn-off for base metal
Stage 2 sintering for base metal
Working with .960 Aussie Metal Clay Argentium
Torch burn-off
Firing setup
Benefits of Argentium silver clay
Video 3: Real Leaf Pendant and Torch Firing
This video focuses on creating a nature-inspired design using a real leaf.
Topics include:
Creating a leaf pendant from a real leaf
Creating a butterfly from a mould
Creating and attaching a leaf tendril or bail
Cleaning your design
Torch firing your design
Burnishing your finished piece
Video 4: Hollow Forms, Bails, CZ Setting and Finishing
This section covers more advanced construction and finishing techniques.
Topics include:
Making domes
Joining domes
Making a clay sheet
Checking that clay is dry
Rehydrating clay
Creating a bail
“Waking up” your clay
Choosing embellishment tools
Forming a CZ bezel
Creating uniform embellishment balls
Kiln burn-off and sintering for beads
Final design review
Finishing techniques
Recommended Tools and Supplies
Recommended tools for this course include:
Silicone or non-stick mat
Roller
Tissue cutter or blades
Kim’s ClaySpray rehydrator
Kim’s ClayStay metal clay glue
Aussie Lube release agent
Thickness slats or playing cards
Clay pick
Craft or Exacto knife
Sanding pads in various grades
Rubber sanding block
Toothpicks
Ball tools
Silicone-tipped sculpting tools
Pencil
Stirrer
Airtight container
Syringe or extruder
Craft punches
Recommended Firing Supplies
Kiln Firing
Kiln
Wire rack
Kiln shelf
Kiln feet
Premium activated coconut carbon specifically for metal clay
Firing medium for silver or base metals, as required
Firing blanket
Torch Firing
Butane torch
Butane refills
Charcoal block
Soldering tripod
Safety Information
Safety is an important part of working with metal clay. Always follow manufacturer instructions, work in a suitable area, and use common sense when handling materials, tools, and firing equipment.
Some people may be sensitive to metals and may experience skin reactions. Gloves or a barrier cream may help minimise contact. Always wash your hands thoroughly after handling metal clay, and do not eat or drink in your workspace.
When sanding dry clay, small airborne particles may irritate the sinuses, lungs, or throat. Wear a dust mask and gloves, and ensure good ventilation.
When firing with a torch or kiln, keep appropriate safety equipment nearby, such as a fire extinguisher or fire blanket.
Firing Safety
Torch Firing
Before torch firing:
Remove flammable objects and materials from your work area
Wear clothing that is not loose or dangling
Tie back long hair
Wear closed-toe shoes
Protect your eyes with green #3 safety glasses or goggles
Fire in a well-ventilated area
Kiln Firing
When kiln firing:
Place your kiln on a stable, non-flammable surface
Allow approximately 30 cm or 12 inches of clearance around the kiln
Follow the kiln manufacturer’s setup and use instructions
Wear green #3 safety glasses or goggles when looking into a hot kiln
Fire in a well-ventilated area
Firing Supports and Mediums
Some metal clay designs may require support during firing.
Common support materials include:
Finishing and Polishing
Fired metal clay is extremely hot immediately after firing. Allow pieces to cool naturally before handling.
Never uncover a design containing gemstones or glass cabochons while hot, as these materials may be prone to thermal shock.
Use tongs, tweezers, or long-handled pliers to move hot pieces to a non-flammable cooling surface. Heat-resistant gloves and long sleeves can also help protect against residual heat.
When polishing, ensure good ventilation and wear gloves, a particulate mask, and eye protection.
Using Power Tools
Power tools can make metal clay finishing easier, but they must be used safely.
When using power tools:
Tie back long hair
Avoid loose clothing
Wear suitable eye protection
Wear an appropriate dust mask or respirator
Work in a well-ventilated area
Use a dust collection system where possible
Follow manufacturer recommendations
Progressing to Level One Instructor Certification
After completing your Foundation Technique Certification, you may choose to progress toward becoming a Level One Aussie Metal Clay Certified Instructor.
To apply for Level One Instructor Certification, you will need to:
Create another set of original designs demonstrating all required techniques
Submit the designs to Roslyn Bailey via Facebook Messenger or email
Submit either:
a video slideshow with written instructions for one project from start to finish, or
a full video showing one of your pieces from start to finish
Pay the one-time Teacher Certification Fee of $65.00 to Roslyn Bailey
Disclaimer
It is mandatory that you conduct your own testing on all techniques, processes, products, materials, and methods shown or taught in Aussie Metal Clay Pty Ltd Technique Certification courses.
Aussie Metal Clay Pty Ltd assumes no liability or responsibility and makes no express or implied guarantees, representations, or warranties regarding the information, processes, materials, or services provided in this course.
By participating in this course, you understand that the use of anything shown or taught is at your own risk.
After paying, you will need to send your YouTube email address to Ros Bailey either through FB messenger or email - info@aussiemetalclay.com (Messenger preferred). If you need any assistance, please contact Ros Bailey for assistance.
To find your YouTube email address please go into YouTube, in the upper right-hand corner you will see either your initial or your icon, would you please click on that and send me what the email address is that is attached to it.
You may NOT resell, modify, share or claim any part of this video or this digital download file as your own work.
Please give credit to the author of this, or any, tutorial when using these techniques.
Embark on a transformative journey in your artistic endeavours by prioritizing self-investment. Elevate your craft, not just through passion, but through deliberate efforts to enhance your skills and techniques. Dedicate time to hone your abilities, explore new methods, and unlock your full potential as an artist.
Challenge yourself to step out of your comfort zone and embrace growth. By investing in yourself, you lay the foundation for a brighter artistic future. Gain confidence in your abilities as you master new techniques and refine existing ones. Let your dedication shine through as you commit to continuous improvement.
As you progress, consider pursuing certification to validate your newfound expertise. Let your certification serve as a testament to your commitment to excellence and your readiness to take on new opportunities. Whether it's through formal accreditation or specialized training, seek recognition for your skills and knowledge.
Dream big and set your sights on new horizons. Take the skills you've acquired and explore teaching opportunities as an AMC (Aussie Metal Clay) instructor. Share your expertise with others and inspire them to embark on their own artistic journeys. As you guide others, you further solidify your mastery and leave a lasting impact on the creative community.
Remember, your potential as an artist knows no bounds. The greatness you achieve is directly proportional to the investments you make in yourself. Join our certification program designed specifically for aspiring metal clay artists and educators eager to elevate their craft. Together, let's sculpt a future where creativity knows no limits.
Foundation Technique Certification Course
Build confidence in the essential Aussie Metal Clay techniques with this comprehensive Foundation Technique Certification course.
This course is designed to help you develop, practise, and submit a range of foundational metal clay techniques for assessment. Upon successful completion, you will receive a Foundation Technique Certificate.
Please note: this course does not certify you as an Aussie Metal Clay Certified Instructor. Once you complete your Foundation Technique Certification, you will receive guidance on the next steps to progress toward becoming a Level One Aussie Metal Clay Certified Instructor.
Once you have completed the Aussie Metal Clay Foundation Course you can apply to complete your Level one Teachers Certification
Certification Options
The Foundation Technique Certification offers flexible certificate options. You may choose to complete your certification in:
Base Metal
Silver
Both Base Metal and Silver
Duplicate certificates are available if you complete more than one category.
What You Will Learn
This course covers a wide range of core metal clay skills, including:
Working with textures, templates, and moulds
Doming and draping techniques
Creating and attaching bails
Weaving and syringe weaving
Using embeddables and findings
Creating leaf-textured pendants
Making hollow lentil beads
Setting CZ stones
Creating matching embellishments
Sanding and refining greenware
Torch firing .999 silver
Kiln firing silver, .960 silver, Argentium silver, and base metals
Finishing and polishing fired pieces
Course Outline
Video 1: Introduction, Products, Tools and Safety
In this section, Ros Bailey and Kim Booklass introduce the Technique Certification course and the Aussie Metal Clay product range.
Topics include:
Aussie Metal Clay base metals
.999 and .960 silver clays
ClayStay Syringe
ClayStay Pen
ClaySpray
Aussie Lube and essential oil release agents
Suggested tools
Drying equipment
Drying tests
Tumblers
Kiln containers
Safety essentials
Video 2: Core Techniques in Silver and Base Metal
This video introduces key forming, firing, and construction techniques.
Topics include:
Templates, textures, and moulds
Doming in silver
Draping and embeddables in silver
Weaving in silver
Kiln firing .999 silver
Syringe weaving and bails in base metal
Draping and embeddables in base metal
Stage 1 burn-off for base metal
Stage 2 sintering for base metal
Working with .960 Aussie Metal Clay Argentium
Torch burn-off
Firing setup
Benefits of Argentium silver clay
Video 3: Real Leaf Pendant and Torch Firing
This video focuses on creating a nature-inspired design using a real leaf.
Topics include:
Creating a leaf pendant from a real leaf
Creating a butterfly from a mould
Creating and attaching a leaf tendril or bail
Cleaning your design
Torch firing your design
Burnishing your finished piece
Video 4: Hollow Forms, Bails, CZ Setting and Finishing
This section covers more advanced construction and finishing techniques.
Topics include:
Making domes
Joining domes
Making a clay sheet
Checking that clay is dry
Rehydrating clay
Creating a bail
“Waking up” your clay
Choosing embellishment tools
Forming a CZ bezel
Creating uniform embellishment balls
Kiln burn-off and sintering for beads
Final design review
Finishing techniques
Recommended Tools and Supplies
Recommended tools for this course include:
Silicone or non-stick mat
Roller
Tissue cutter or blades
Kim’s ClaySpray rehydrator
Kim’s ClayStay metal clay glue
Aussie Lube release agent
Thickness slats or playing cards
Clay pick
Craft or Exacto knife
Sanding pads in various grades
Rubber sanding block
Toothpicks
Ball tools
Silicone-tipped sculpting tools
Pencil
Stirrer
Airtight container
Syringe or extruder
Craft punches
Recommended Firing Supplies
Kiln Firing
Kiln
Wire rack
Kiln shelf
Kiln feet
Premium activated coconut carbon specifically for metal clay
Firing medium for silver or base metals, as required
Firing blanket
Torch Firing
Butane torch
Butane refills
Charcoal block
Soldering tripod
Safety Information
Safety is an important part of working with metal clay. Always follow manufacturer instructions, work in a suitable area, and use common sense when handling materials, tools, and firing equipment.
Some people may be sensitive to metals and may experience skin reactions. Gloves or a barrier cream may help minimise contact. Always wash your hands thoroughly after handling metal clay, and do not eat or drink in your workspace.
When sanding dry clay, small airborne particles may irritate the sinuses, lungs, or throat. Wear a dust mask and gloves, and ensure good ventilation.
When firing with a torch or kiln, keep appropriate safety equipment nearby, such as a fire extinguisher or fire blanket.
Firing Safety
Torch Firing
Before torch firing:
Remove flammable objects and materials from your work area
Wear clothing that is not loose or dangling
Tie back long hair
Wear closed-toe shoes
Protect your eyes with green #3 safety glasses or goggles
Fire in a well-ventilated area
Kiln Firing
When kiln firing:
Place your kiln on a stable, non-flammable surface
Allow approximately 30 cm or 12 inches of clearance around the kiln
Follow the kiln manufacturer’s setup and use instructions
Wear green #3 safety glasses or goggles when looking into a hot kiln
Fire in a well-ventilated area
Firing Supports and Mediums
Some metal clay designs may require support during firing.
Common support materials include:
Finishing and Polishing
Fired metal clay is extremely hot immediately after firing. Allow pieces to cool naturally before handling.
Never uncover a design containing gemstones or glass cabochons while hot, as these materials may be prone to thermal shock.
Use tongs, tweezers, or long-handled pliers to move hot pieces to a non-flammable cooling surface. Heat-resistant gloves and long sleeves can also help protect against residual heat.
When polishing, ensure good ventilation and wear gloves, a particulate mask, and eye protection.
Using Power Tools
Power tools can make metal clay finishing easier, but they must be used safely.
When using power tools:
Tie back long hair
Avoid loose clothing
Wear suitable eye protection
Wear an appropriate dust mask or respirator
Work in a well-ventilated area
Use a dust collection system where possible
Follow manufacturer recommendations
Progressing to Level One Instructor Certification
After completing your Foundation Technique Certification, you may choose to progress toward becoming a Level One Aussie Metal Clay Certified Instructor.
To apply for Level One Instructor Certification, you will need to:
Create another set of original designs demonstrating all required techniques
Submit the designs to Roslyn Bailey via Facebook Messenger or email
Submit either:
a video slideshow with written instructions for one project from start to finish, or
a full video showing one of your pieces from start to finish
Pay the one-time Teacher Certification Fee of $65.00 to Roslyn Bailey
Disclaimer
It is mandatory that you conduct your own testing on all techniques, processes, products, materials, and methods shown or taught in Aussie Metal Clay Pty Ltd Technique Certification courses.
Aussie Metal Clay Pty Ltd assumes no liability or responsibility and makes no express or implied guarantees, representations, or warranties regarding the information, processes, materials, or services provided in this course.
By participating in this course, you understand that the use of anything shown or taught is at your own risk.